I'll admit it. I have a new love in my life and it's the C100. When the camera first came out everyone was poo-poo-ing it. "It's only 8-bit. It only has AVCHD. It doesn't overcrank....whaaaa, whaaaa, whaaaa." Heck, even I said some of those things. However, then I used the C100 and found that the camera shoots super sharp images and is much easier to use than most video cameras I've used before. After about 3 hours with the camera I felt right at home.
Most of us know that the C100 was meant to attack the video DSLR upgrade market. I started out on a 5D mark II, as did a lot of other people. It was our gateway drug, so to speak. The director I shot for on Tuesday started out on a borrowed T2i. After using this camera on Tuesday night he sent me a follow up email on Friday with a picture of his newly purchased C100! So I guess the C100 is the gateway drug to a Red Dragon or Alexa or Amira (my personal dream camera).
Since the director and myself are now both converts I thought it would be good to discuss the reasons why you might also want to consider the upgrade from DSLR to a C100. In no particular order...
1. Record Time, Card Backup, and Record Roll Over
Most DLSR cameras are limited to either 12 minutes or 29:59 minutes. This is no good for event video. Your producer/client probably expects you to roll the whole event. Video cameras have been able to do this for years with solid state media. Notice how the C100 has dual card slots? This means that you can either create a RAID type backup during recording, for the unfortunate times when a card goes bad, or have the camera roll over to the next card when the other one is full. (sarcastically) Cards NEVER go bad, right?

2. Improved Rolling Shutter
I set the C100 and 5D mark II on a tripod and panned along my backyard fence. Notice how the C100 has about half the rolling shutter of the 5D mark II. Obviously this is going to be better for cases where you need to pan or catch action sports. If you're doing corporate interviews, then yeah, it's not of any benefit. Now before you go into the camera snobbery of global shutter remember that the Alexa, Epic, Dragon, and F5 all have rolling shutter. Have you complained about rolling shutter in any of the Academy Award nominated films last year...didn't think so.

3. Complete Audio I/O
The most obvious thing I can say here is that the C100 has proper XLR audio inputs with phantom power. How many people went out and bought Zoom H4H recorders when the 5D mark II came out? A lot! Then there was a hassle of syncing the externally recorded audio to the DSLR mic audio and also finding out that the DLSR audio is either 2 or 3 frames off on the 5D, depending on which mark II/III model you own. People came out with all types of gadgets to try to plumb audio into the 5D mic input jack, only to find that it's limited by the wind filter you can't turn off and it's still noisy. Then there was the issue of where to jerry-rig the shotgun mic! I've seen type of ridiculous setups where it was probably cheaper in the end to just buy the C100!
Well...as you can see, the C100 has a shotgun mic mount, proper XLR audio inputs with level controls and phantom power, all built into the removable top handle. If you don't need sync audio, don't mount the top handle. Then the camera is just a little bigger than a DSLR body.
Did I mention that the camera has a headphone output? I can't count the number of time I wished for this on my 5D. Some of the new generation DLSR cameras have it. Most don't.


4. 12-stops Of Dynamic Range
The C100 has 12 stops of dynamic range in either WDR (wide dynamic range) or C-log modes. Yes, I'm aware of the claims surrounding the DLSR cameras, but in neutral/faithful picture styles on the Canon DSLRs I could only measure about 8.5 stops. If I turn on highlight tone priority I can get another stop, but at the cost of increased noise. I've tried all types of tricks like turning the contrast down to -2 or -4, but that just leads to issues in post due to the heavy compression applied in the camera. In contrast (pun intended), the C100 has a true 12 stops of dynamic range available. The range above/below 18% gray changes with ISO/gain. At 0dB (ISO 640) or +2.5dB (ISO 850) you have 5.3 stops above and 6.7 under. The highlight range isn't on par with the Alexa, but good enough for the vast majority of situations...much better than most DLSR cameras in reality.
My preference is to use WDR mode most of the time. The C-log gamma curve can be a bit much to adjust in post given the internal 8-bit 4:2:0 AVCHD compression. The WDR gamma curve is closer to a look you might want straight out of the camera without adjustment. Combined with a Atomos Ninja, the C-log might make a bit more sense for projects that have the budget for a DI. You can even dumb down the C100 to match the Canon DLSR picture style if you want by choosing the "EOS Std" gamma and color matrix.


5. Excellent Low Light Performance
This is one area where the C100 and the whole Canon C-series really shine. There are two pictures below. One is from my 5D mark II, the other from the C100 with WDR gamma. Both images were captured at ISO 3200, f/2.8, and 1/48th (C100) or 1/50th (5D). I encourage you to pixel peep the images in full detail by clicking on them. To give the 5D a fair chance I turned the contrast down to -2 and turned off highlight tone priority. Notice how the 5D images lacks detail and shadow exposure range? It's very noisy and this camera hasn't even heated up yet! The C100 really shines here and I've even limited its low light range by increasing the ISO all the way up to 3200. There's still plenty of detail in the C100 image and it's not really noisy at all.
In fact, the ISO range goes all the way up to 20,000 on the C100. I've heard of documentary folks going to ISO 10,000 in emergency situations where they were on a bus at night and wanted to document the passengers with just street lights coming in side windows. The footage was noisy, but not unacceptable for their purposes. If you REALLY want to push things there's an ISO 80,000 mode available, which I've talked about before on this blog. That sees further into the dark than you and I can!


6. No Moire and Aliasing
As anyone who has used a DLSR to record video in the last 7 years knows, moiré and aliasing due to sensor line skipping is a huge problem. Fabric, bricks, ocean waves, leaves...everything sets it off. Mosaic Engineering came out with an add-on anti-aliasing filter to eliminate the problem, but it meant that you had to trust the mirror lock up function on your camera and hope the battery didn't die so the mirror didn't come crashing down on the filter! Admittedly, things have gotten better with the 5D mark III which doesn't seem to line skip anymore. However the vast majority of video DLSR cameras still do.
The first picture below is from the 5D mark II in video mode. The second picture is from the C100. Now before you go saying that the C100 image has aliasing patterns I want you to know that it's actually the scaling that the web browser is doing. Save each image and view them at 50%, then you'll see the difference. If you examine the difference at 100% you'll see specs of blue and red in the 5D picture from the moiré. Neither of those issues exist in the C100 in my testing.
With the C100 you don't have to worry as much about the type of fabric your talent shows up wearing or the background behind the talent. That's a big deal for local commercials and corporate video.


7. Long Battery Life
My experience with Canon DLSRs has taught me to expect about 80 minutes per LP-E6 battery. In terms of capturing an event, it can be frustrating to have to stop and change batteries. I have had to do this multiple times during a multi-hour interview. As the photo below shows the C100 takes large batteries, . The experience of owners is that they can get 5 or more hours of record time on a single battery. If that's not enough, you can move to an external battery brick solution which should last you an entire day of shooting. If you still need to fill up SD cards and your back isn't killing you then you can plug the camera into a wall, via adapter, and go however long you want.
During shoots with a DSLR I had to check lighting on the camera, turn off the camera, make adjustments, then turn the camera back on to see the results. If I kept the camera on the entire time the battery would be nearly dead by the time I started shooting.


8. Built In ND Filters
Anyone who does run and gun or any shooting outdoors comes to rely on neutral density filters. the C100 has a 2-stop (0.6), 4-stop (1.2), and 6-stop(1.8) ND filters built into the camera. The DLSR's...nada. They are designed to click at ultra fast shutter speeds when the scene is too bright. With the C100 I only have to carry a 0.3ND, a 0.6 ND grad, and a polarizer in my kit and most of those stay in my kit until I have a specific problem to solve.
Yes, you can get a matte box and run external filters, but "good" ND filters, such as the Tiffen Water White ND's, typically run about $350/ea. That, and when you use ND filters in a matte box there is a reasonable chance that you will get reflections off the lens onto the ND filter. The more you stack in the box the more chance of reflections corrupting your image. I've run into this before when filming outdoors. It's not rare. Since the C100 filters are built into the sensor cavity there is nothing to reflect off of, so you don't get problems with filter reflections.
Then there's the inevitable question about variable-ND filters, which was my go-to solution with a DSLR. Vari-ND filters are just two polarizers. Most of the cheap ones are made out of plate glass, so they shift your white balance into green (seen it). The expensive ones don't shift into green, but they still act as polarizers - removing specular reflections; which you may not want to do.

9. Articulating Color Accurate LCD Display
Yes, *some* DLSR cameras have articulating LCD display, but most don't. For instance, the 5D mark III and 1DC don't have articulating LCD displays. Typically you're not at eye height with the display, so having an articulating display is useful and often a must. The only thing better would be and articulating EVF, but you have to dig a bit deeper into your pocket for that. The Sony EVF is around $5k. The new Zacuto one is estimated around $3k.
The C100 comes with an EVF, but it's terrible at best. I'm not the first person to announce this on a blog, so I feel pretty comfortable in my opinion. Unless you absolutely need it in an emergency in an ultra-bright shooting situation I wouldn't count it as being an advantage.
That said, the LCD on the C100 is excellent and good enough to judge focus pulls most of the time. It's also reasonably color accurate, unlike the DSLR rear LCD's tend to be.

10. Active Cooling
There's a reason the new generation of video capable DSLR cameras have an over-temperature sensor on them. Since the DSLR's don't have active cooling I've seen them overheat in 10 minutes. When Shane Hurlbut, ASC was filming Act of Valor he wrote about exchanging cameras every 10 minutes because the sensor would heat up and the image would suffer with noise. That's an unlikely scenario with the C100. It has a fan and cooling system that keeps the sensor a reasonable temperature so you can film all day long with similar noise performance and little chance of over heating.

11. Handheld Ergonomics
This has been a gripe of DSLR users like me since the first time I hit the record button the 5D mark II (which is actually the "SET" button). Notice how my index finger is positioned on the record button? My thumb is near the magnification check button and menu joystick control? This camera wasn't designed for south-paws, but still...the major controls are all within the pistol grip. The camera is so small that going handheld isn't that big of a deal. As long as you aren't using a large lens the camera is light enough to carry around for a few hours and use the EVF for framing. The aforementioned articulating screen makes it easy to hold the camera away from your body and still have complete control. The side strap also helps stabilize the connection with your hand quite well. You *can* approximate this with a DSLR body, but don't expect it to be as stable and without an articulating screen you won't be able to see all the shots on the rear LCD.
One major thing to not about the pistol grip is that it swivels. So if you need to angle the camera up or down for a long period of time you don't have to cock your wrist to do so. Just change the angle of the grip.
The other controls are on the left side of the body, so there is little chance of changing a setting accidentally, unlike my experience with the top scroll wheel on my 5D.

12. Full Featured In-Camera Image Control Options
If you press the "CUSTOM PICTURE" button on the left side of the camera be prepared to have a whole new world opened to you. On a Canon DLSR you get picture style, saturation, contrast, sharpness, tone, and white balance shift. That's about it.
On the C100 you can select from multiple gamma curves. The saturation control not only includes saturation, but also low key saturation which allows you to roll off color with dark environment, like your eyes do. There are multiple color matrix options as well as custom color matrix paint controls; the same as any professional video camera. The sharpness options are extensive. They let you change which tones and which direction you apply sharpening to, as well as how much. You can custom tweak the gamma curve for your particular scene in real time. There's also the familiar white balance shift function from the EOS digital cameras...plus a few more items. The point being that you have extensive control over your image, whereas a DLSR typically doesn't. The only DSLR-type camera I've seen come close to this is the Panasonic GH4.
When I need to tweak something on my 5D I had to use the Canon Picture Style Editor software, take a picture in raw format, download it, tweak the picture, save the custom picture style, then upload the picture style file to the camera and see how it really does. Sometimes it worked, sometimes it required a few tries. With the C100 if you have an image tweak you need to do you can do it in real time on the camera and watch the results on the monitor as you tweak. That's a huge time saver in most cases if you're picky about capturing the final image in camera, as I am.
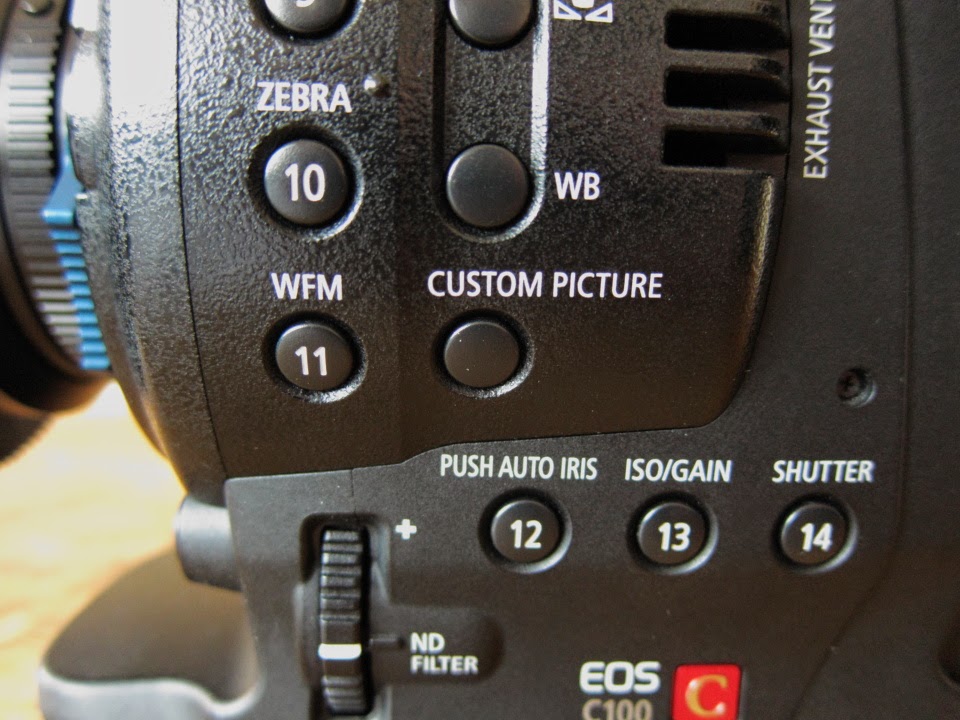


13. Dedicated Exposure Control Buttons
I still get confused about which knob controls aperture versus shutter speed on my 5D mark II. With the C100 you have 3 dedicated exposure control buttons. They are clearly marked and their function is obvious. That's a time saver on set when you have a client breathing down you neck about getting that one last shot before the sun goes down.

14. Full Size HDMI With Full 1080i Output
Anyone who has rigged up a DSLR with an external monitor of any kind will tell you about the nightmares of breaking off mini or micro-HDMI connectors. They just don't work on set. The C100 has a full size HDMI connector with 1080i output at all times. It doesn't switch down to SD while recording like my 5D mark II. It doesn't output 720p while recording like some DLSR's do. It outputs full 1080i. The only issue being that it's 1080 59.94i, not 1080 24p/30p. Using an external recorder like the Atomos Ninja requires you to wave your hand in front of the lens for 5 seconds while the recorder figures out how to do the 3:2 pull down for capturing 24p, but it otherwise works brilliantly.
I've seen all types of crazy bracing contraptions bolted to the side of DLSR cameras to protect the HDMI port from breaking. It's a stupid design. The only thing more durable/better than this is an SDI BNC output connector, but you have to step up to the C300 to get that connector.
The HDMI output is also 4:2:2 8-bit. So if you use an external recorder it will give you enough detail to green screen just about anything without weird haircuts and clipping edges of clothing.

15. Ultra-HD Resolution Sensor
I bet you're thinking "yeah, yeah, yeah...it's got an HD sensor. Big deal." Well this sensor is designed to be exactly ultra-HD, which means it has 2x the number of required pixels for HD in both the vertical and horizontal axis. Why is that a big deal? It means that Canon can scale down the image to HD exactly by a factor of 2. Anyone who has used Photoshop knows that an exact integer scale-down is much more sharp and scaling artifact free than scaling an image with a non-integer multiplier. The C100 shows just that. It's razor sharp in HD without applying sharpening in the image processing pipe. This translates to more detailed images for you and your client.
The AVCHD codec softens the image a bit, as does any lossy compression. However when you use this camera with the Atomos Ninja and a good lens, watch out! You could cut yourself! It's that sharp. In green screen tests I was able to correctly key fly away hairs on a person.
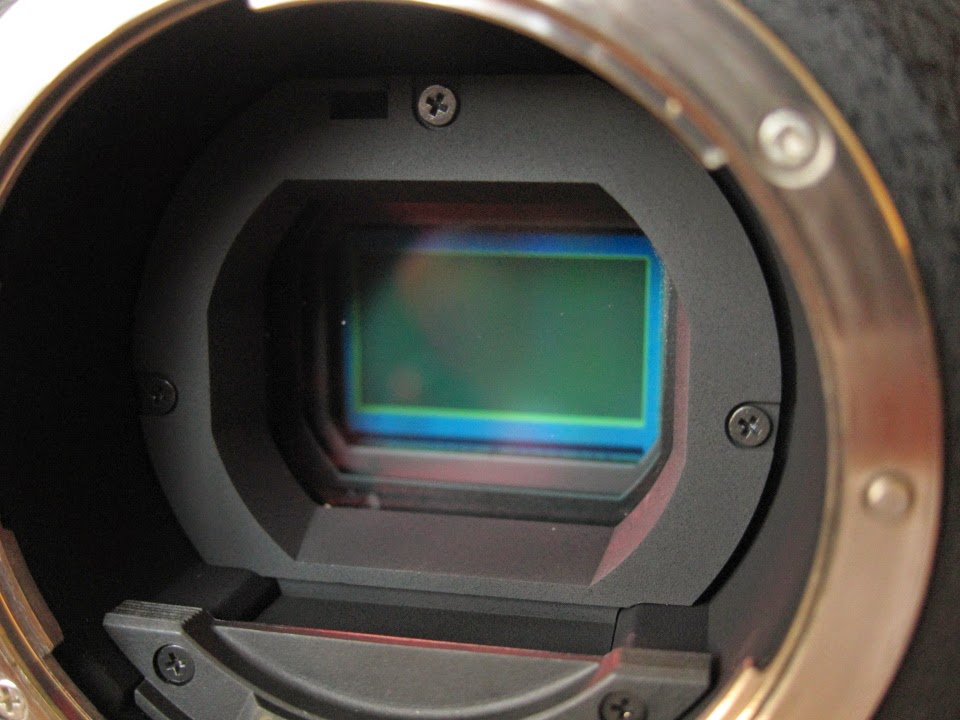
16. Image Analysis Buttons
DSLRs are starting to get *better* in this area, but still don't perform as well as controls on a dedicated video camera. In the photo below you see magnification (which is also near the right thumb position), peaking, zebras, and real time waveforms. My 5D mark II offers some of this functionality in the sense that you can do magnification before recording and it now offers a histogram, but that's not quite what I need. I want magnification while I'm recording so I can pull focus on a person's eyes. I want a luma waveform that shows IRE so I know where my exposure is. A simple histogram doesn't really give you that.
There is the option of the "Magic Lantern" hack for the Canon DLSRs. My friends describe it as not crashing "that often." The GH4 offers more of these controls including peaking and zebras, which is more than I can say for my experience with the 1DC! At any rate, the controls are there and easy to use. I use them all the time now. I don't want to dig through menus to enable and disable these assist functions, like I would have to on a DLSR type camera. It's too slow and awkward.

17. Shutter Time and Angle Options
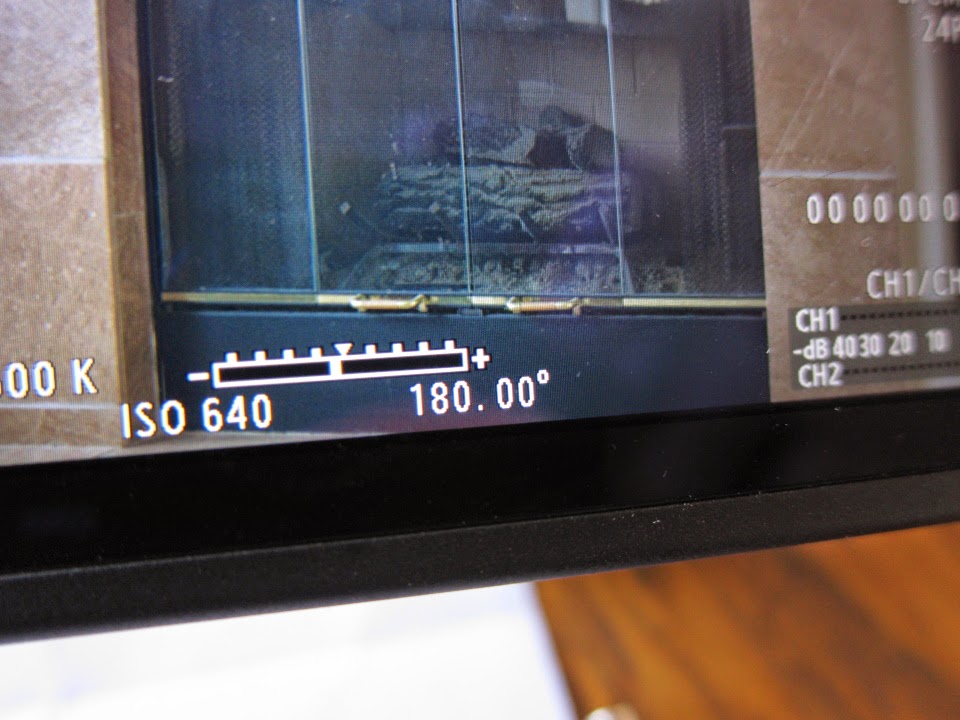
When I first began I didn't know what a shuttle angle was. Now that I know, I prefer to use that instead of absolute time for shutter speed. Independent of frame rate, most often I use a default 180-degree shutter angle. Since the C100 allows me to set the shutter either as time or angle, I prefer angle since that means I don't have to switch shutter settings when going between 24p and 30p. It just works.
Through a video from Bill Bennett, ASC I found out that most car commercials are shot with a shutter angle of 220 degrees to get the wheels to spin in the right direction. For fast action sequences I might thin the shutter to 90 or 45 degrees. For late night shooting I might open the shutter to nearly 360 degrees to get another stop of light. In Europe they use a 172.8 degree shutter angle to get around 50Hz light flickering. Speaking as a cinematographer, it's great to have this image option control. No DLSR that I've seen so far gives me shutter angle control. It just doesn't make sense on a still photo camera.

18. Easy Access To White Balance Controls
On my 5D and every other Canon DSLR you have to take a picture of white card in raw, go into the menu, select that raw image as the white reference, then set the custom white balance using that image, then exit the menu. On the C100, white balance is just a button press away. If you want to use color temperature, then just press the WB button followed by the dual ramp button and use the joystick to select the color temperature (assuming the white balance is already set to "K"). The white balance function with the C100 takes *much* less time and is *vastly* more convenient.


19. Dual Pixel Hybrid Auto-Focus
The C100 has built in contrast auto-focus. With the dual-pixel phase detect auto-focus upgrade the camera can more accurately and quickly find correct focus. What Philip Bloom found is that you want to enable and disable auto-focus most of the time, so he assigned auto-focus enable/disable to one of the programmable function buttons. That way he could shift focus whenever he saw an opportunity to re-focus correctly.
It's not a be-all, end-all by far. The dual pixel AF only works near the center of the frame. So if your subject moves away from the center there's a chance they will be taken out of focus. There's also the danger of seeing the lens breathe as it refocuses, as most DLSR lenses do - some severely.
I tried contrast auto-focus on the GH4 and found it to be problematic most of the time. It always wants to hunt to infinity given any opportunity. Fast or not, accuracy counts. That's why I mostly use Zeiss lenses and pull my own focus manually.
So it's a matter of the correct situation to use this feature. It definitely has it's place for projects like weddings, live performance capture, or some sports.

20. Clients Like Expensive Looking Gear
Like it or not, clients look at your gear and judge the value they are receiving. Even if you're brilliant with a T5i, they will still think that they could have hired the boss's high school aged offspring who has the exact same camera for $100/job. Clients want to think they are receiving the maximum value from their money, time, and effort. Bringing in cheap equipment doesn't help your business, even with great lighting and skill.
Every time I bring a fancy looking camera rig with me everyone oooohs and aaaahs. Their skin could be green on camera because I haven't white balanced and they could be fully lit from overhead because we haven't setup lights yet, but man do they think they're getting value. Fancy gear increases your credibility and perceived value. Do they know the difference between a C100 an C500 - not likely. But they know it's big, looks like a professional video camera, and has lots of bewildering buttons. In gadget speak...it's AWESOME!