
Video Lights. How exciting could they possibly be? Well...these lights are a bit different. Plasma lighting technology was originally developed for DLP televisions, but when televisions went on an anorexic diet there wasn't a need for a new bulb technology anymore. The smart folks at Hive took this developing technology and applied it to work as video specific lights. Here is a brief list of advantages.
- The color temperature is 5600K, matching daylight perfectly. If you read my previous blog post you would know that HMI's actually run 6100-6300K; blue-r than daylight. Kino-Flo daylight bulbs are actually 7000K. Unlike LED's there's no green or magenta shift. Cameras are optimized for daylight, so this means your image noise will be optimized for any given ISO.
- These lights are full spectrum, just like tungsten and HMI. LED's are generally not.
- The light lacks severe infrared, so you won't fry talent working under these lights. It reduces make-up touch ups.
- You can operate on these lights without gloves. They get warm, but not fry-your-fingerprints-off hot like tungsten and HMI lights.
- Unlike HMI there's no risk of UV exposure. You can operate with or without a lens, just like tungsten, LED and fluorescent.
- The lights are more efficient than HMI (which obviously means much more efficient than tungsten). The 275W PAR has about the same output as a 400W Joker.
- The lights take 90 seconds to fully turn on, which is faster than HMI. Unlike HMI, you can turn the lights off and immediately strike them again. Anyone who has used HMI's knows the burden of turning those lights on and off along with the risk of blowing a bulb.
- There's no filament. The bulb is a tiny glass container with gas that turns into plasma when radio waves are emitted into the gas - no, this won't interfere with your wireless audio - tested it yesterday on a real production. Bulb life is many years
- Speaking of audio, there is no hum as you typically have with HMI lights. The ballast runs at about 450MHz according to Jamie.
- Since the ballast is so high speed, you can shoot with any high speed frame rate. Even the Arri HMI ballast runs at 1kHz, making the maximum frame rate 500fps. These lights are ideal for slow motion with absolutely no flicker.
- Hive does make a single model that can shift color temperature, however I'll explain that in a follow-on post.
As I just mentioned, the "Killer" is a 2-light maxi-like PAR light fixture. You can gang them in groups of 2 if you want to form a 4-light maxi. I took the first picture below just seconds after the light was starting to fire up. Total light up time is around 90 seconds. If I would have waited the entire time there is no way I could have taken this picture due to massive lens flare! This light can be used to supplement outdoor sunlight!

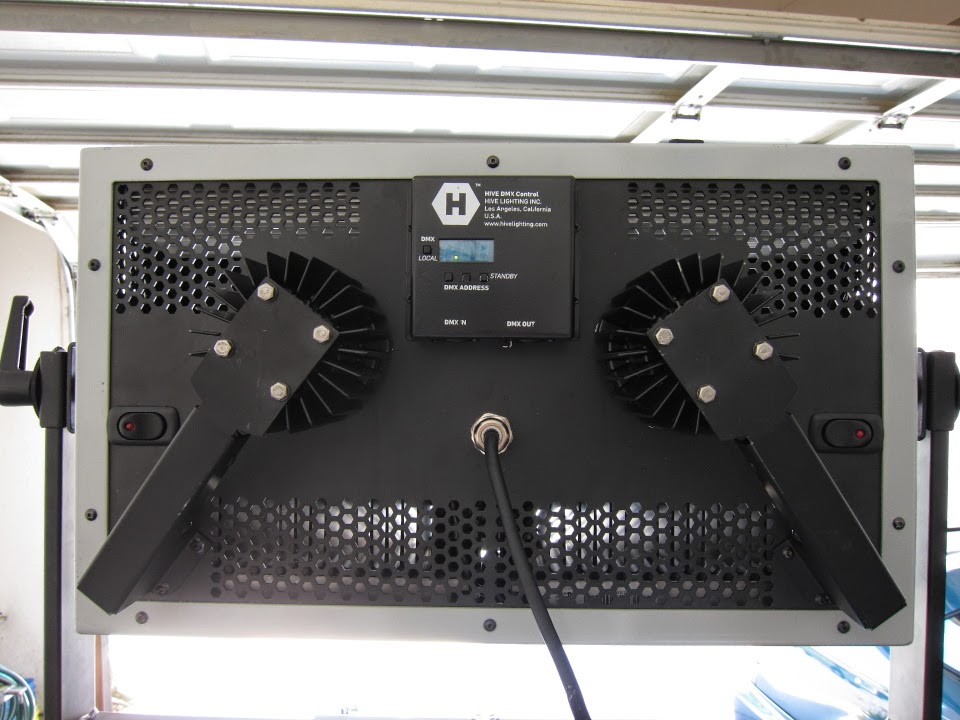
There is a slight trick to turning on the "Killer". You have to follow a specific sequence, which isn't difficult, but it's not completely obvious either.
- Turn on the in line power switch
- Turn on each of the two light fixture switches at either far side of the back panel. The red LEDs should come on.
- Make sure that the DMX control is in the correct mode by pressing the button, as I'm doing in the photo.


The fixture frame includes a "junior" pin, which I measured as about 1-1/8", so you can't use this fixture with a standard c-stand. You need a light stand that can handle a junior pin, which means renting a much larger stand. Not to worry, we have a Matthews one that doesn't take up that much more room than a standard c-stand. It's show in the photo at the bottom. I used it in a house yesterday without issue.

Hive designed the light fixture to utilize standard 8-1/2" lenses and scrims. The light comes with 8 lenses (4 for each side) and 10 scrims, including half scrims. If you already own these for your Arri or Desisti fixtures, then you're set.


I know I said I wasn't going to bore you with behind the scenes mayhem, so this is as far as I'll push it. I shot a cooking show with these lights in a residential home yesterday. After blasting these lights through a sheet of bleached muslin I was able to get an exposure of a 5.6/8 split on the FS-700. Even without air conditioning we were able to work under the lights for six hours without having to stop for sweat and makeup change. They just don't output significant amounts of infrared! I set the camera to daylight white balance and the color balance was dead on! I've never had that happen with HMI, LED, or Kino-Flo.

The light is living in my garage tonight, but it will be back in the shop at 8:30am tomorrow morning. Come down and check it out. Over the next two weeks I'll cover the "Wasp" and "Bee" lights from Hive.
No comments:
Post a Comment